Advertisement
Route 1-3 Placement & Boss Guide
Route 1-3 introduces a key shift in boss mechanics, requiring players to move beyond simple status-based strategies. Moltres is immune to Poison and Burn, forcing a stronger focus on raw damage and control effects. In this guide, we’ll break down the recommended role-based placements and explain how to defeat Moltres efficiently using DPS, along with Slow and Stun to maintain control throughout the fight.
Placement Per Role
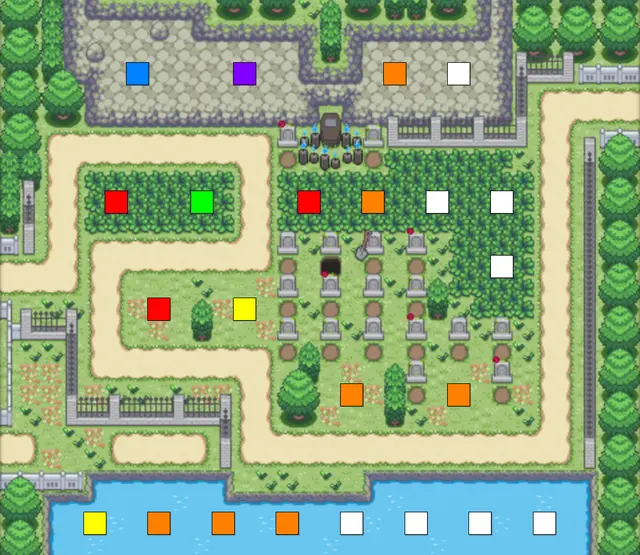
Color Legend:
- 🟦 AoE DPS / Armor Breaker → Best against tanky enemies. Excels at breaking armor and dealing heavy area damage.
- 🟥 AoE DPS → Built for wave clear. Hits multiple enemies at once and keeps pressure off your defenses.
- 🟨 Slow / Stun → Controls enemy movement. Slows or stuns targets to stabilize tough waves and bosses.
- 🟧 Close / Range DPS → Versatile damage dealers that work well either up close or from a distance.
- 🟪 Anti Invisible → Essential for revealing and damaging invisible enemies on specific routes.
- 🟩 Aura → Provides passive buffs to nearby allies, improving overall team performance.
- ⬜ Unrecommended→ Generally not recommended, but can work with good micro or in specific challenge setups.
How to Defeat Moltres
Moltres changes the rules.
Important mechanics:
- Immune to Poison and Burn
- Slow and Stun still work
- You must rely on strong DPS
This video shows the minimal setup required to defeat it.
Advertisement